What is possible and not possible during the Nativity Fast?
In 2018, the Nativity Fast will begin on November 28. During this period, Orthodox believers prepare to celebrate Christmas...
Do you want to pierce your ears? We have no doubt that everyone will gasp with delight when they see the end result. But keep in mind that getting your ears pierced is not so easy and sometimes even risky. However, if you're like those twins in The Parent Trap and really want to get your ears pierced so you can replace your sister (or because you just like the look of earrings), then read the tips below. They will tell you how to safely pierce your ears and start watching everyone with the shine of the jewelry hanging in them.
If possible, use cotton balls soaked in 70% isopropyl alcohol. You will need them to wipe the puncture site to prevent infection from getting there. Allow the alcohol to evaporate before piercing your ear.
Mark the area you want to pierce. Hopefully you have planned ahead where you want to get your piercing. Otherwise, your earring may hang crookedly, too high or too low in your ear. If you are getting both ears pierced, look in the mirror and make sure the marks are straight.
Buy a sterile piercing needle. It's hollow inside, so when you pierce her ear, you can then easily insert the earring into it. These needles can be purchased online or at piercing studios. Do not share needles with other people to prevent the spread of infection and disease.
Choose your earrings. When you first pierce your ears (lobes or cartilage), it is better to wear special stud earrings for a while. A good size would be earrings that are 16 gauge and about 10mm long. This length will allow you to wear them even if your ear swells.
Sterilize the needle over fire. Do not use other people's needles; your needle must be in sterile packaging. Keep the needle in the flame until the tip turns red. Be sure to wear sterile latex gloves to prevent bacteria from your hands from getting onto the needle. Wipe off soot and residue from the needle. Wipe the needle with a solution of 10% alcohol or hydrogen peroxide. We warn you that this will only be a partial sterilization and germs may remain on the needle. The only way To completely sterilize a needle is to use an autoclave.
Wash your hands with soap and water. This will reduce any possibility of bacteria spreading. Put on sterile latex gloves after you have washed your hands.
Move your hair away from the area where you plan to get your ear pierced. Your hair may get caught between your ear and the earring, or it may even get caught in the hole made by the needle. If possible, tie your hair into a bun and keep it away from your ear.
Find something to put to your ear. You will need it so that when you pierce your ear, you don’t accidentally prick yourself in the neck. A piece of soap or cork, for example, will do. Avoid applying apple or potato. Apples, potatoes, or any other fruit or vegetable you were thinking of using contains bacteria that will cause inflammation at the piercing site.
Aim the needle correctly towards the ear. The needle should be directed perpendicular to the lobe, i.e. at a 90 degree angle to the mark you made on the ear. This will allow you to pierce more effectively.
Do deep breath and pierce your ear with a needle. Make a puncture in the place you marked. You can hear the needle going through the cartilage. Don't be alarmed. Move the needle and tilt it slightly. If you are using a hollow piercing needle, insert the stem of the earring into the needle.
Put on the earring. After you have pierced your ear, do not remove the needle, but insert the stem of the earring into it. Thread the earring through the lobe.
Pull out the needle. Slowly remove the needle from the lobe. Try to keep the earring in place. It may hurt a little, but try not to rush, otherwise the earring will fall out of your ear.
Let the earring remain in your ear for six weeks. Do not remove the earring. After six weeks have passed, you can put in another earring, but do it right away. It can take anywhere from six months to a full year for the hole to fully form and not “grow over” if you leave it without an earring for any length of time.
Wash the puncture site daily. Rinse your ear with a warm salt water solution. Use marine or Epsom salt, and not a simple cookery one. Salt will clean the puncture site and protect it from infection. Do this until the piercing is completely healed (about 6 weeks). Don't rub your ear medical alcohol.
Today we will talk about how to pierce your ears yourself, without pain, at home. Earrings have long ceased to be considered an extravagant or amazing type of jewelry. In almost any salon, for a fee, you will get your ears pierced quickly and almost painlessly. But the flow of those who want to do this procedure on their own is not decreasing. Fortunately, ear piercing can be done at home.
In our country, the tradition of piercing the earlobe arose a long time ago. Already in ancient times, people certainly wanted to decorate their own bodies with something unusual. The first decorations were objects such as flowers, ivory, bright color pebbles. But our ancestors tried to decorate the body not only for aesthetic purposes. By this they wanted to ward off evil spirits and other evil spirits.
From simple decorations, under the influence of time and experience, they became more and more original, voluminous and complex. Ancient people even sought to gain strength through jewelry. Today, it is rare that any woman does not have jewelry in her ears. The desire to stand out and decorate oneself has become the norm.
If you are planning to pierce your ears yourself, you must first understand the structure of this important body. From birth, every person has their own special individual pattern on their ears. The ear and its lobe cannot be corrected with any makeup. To correct the shape of the ears, you can only use radical method, namely a surgical operation.
The Chinese have their own beliefs regarding ear piercing. Their traditions are such that human ear is given the importance of an extremely important organ responsible for the energy sphere of human life. The ear itself contains many different points. These points are responsible for the full functioning of any of the human organs. It is for this reason that a puncture in the earlobe should be done very consciously and carefully. Essentially, ear piercing is a mini operation. And it should be approached with full responsibility.
For ear piercing so that it goes without complications and negative consequences, it is important to choose the right time of year. Winter is considered the most optimal season for this. At this time, “pick up” some dangerous infection It's simply impossible. But in winter, most people wear hats. And if you make careless movements while putting it on, you can accidentally snag the earring, thereby causing injury to your ear.
To pierce your ears, you need to have a special tool, as well as auxiliary materials. The tool you have must have a catheter needle. It is sold in almost any pharmacy. You don't need a prescription to purchase it. To pierce the earlobe, the diameter of the needle should be no more than a millimeter.
Never use a regular sewing needle to pierce your ears. If you puncture with it, the wound will take a very long time to heal. This is due to the fact that sewing needles there is a diameter expansion at the base.
Also, for piercing, you must use only new tool. You should not use a needle that has already been used. The instrument must be completely sterile.
If you are planning to get your ears pierced, choose the best earrings to go with them in advance. An earring that is inserted into a wound that has not yet healed should not be metal. Otherwise, with a fresh puncture, she may enter into chemical reaction and will begin to oxidize. The wound at the puncture site will begin to fester. Ideally, earrings for a fresh piercing should be gold or silver. If you don’t have money for expensive metals, then choose an earring made of medical steel.
It has important and the shape of the earrings. It is better to choose earrings in the shape of a small ring or droplet for an unhealed wound. With them, caring for a puncture will be easier. Earrings should not be heavy or very massive. Choose an option so that in the end the earrings cannot cling to your clothes and do not interfere with you while you sleep.
You will also need:
To pierce your ears, you will need, among other things, some rubbing alcohol. You will use it to wipe your earlobe, your hands, earrings and instruments to sterilize them. Also buy medical cotton wool or cotton pads in advance. Cotton pads will be very easy to wipe earlobe on both sides, and if necessary, dry the released droplets of blood. If you are very afraid of pain, then it is appropriate to take care of pain relief.
Today, the pain reliever is sold as an ointment. But novocaine can also be used to pierce the ears. Just in case, it's worth stocking up and ammonia. If you feel sick, the assistant who should be next to you will have time to let you inhale its vapors so that you can come to your senses.
Before piercing your ear, you should understand that quite a lot of nerve endings. Naturally, hitting the nerve itself with a needle is extremely dangerous. Mark the point of the future puncture in advance with a felt-tip pen. Choose a point strictly in the center of the lobe. And remember that damage to blood vessels and nerves can have extremely serious consequences, including loss of vision.

Bring the instrument treated in alcohol to the lobe and begin to pierce it with force. You may hear a characteristic crunching sound. Don't be afraid of him. It is better to do the puncture not by weight, but by placing it under reverse side slice of apple or potato. After making a puncture, immediately put on the earring, and then you should disinfect the wound again.
There is one remarkable secret related to ear piercing. To make the procedure as painless as possible, the ear should be “frozen” for a while. Regular ice will do for this. Make ice cubes ahead of time. Keep the ice in a bag and hold it against your earlobe for about three minutes before piercing. Then you can proceed to direct piercing.
After piercing your earlobe, do not forget about necessary measures caring for her. The first time you put on earrings, you will feel as if your ears are literally “on fire.” It is even possible that they will swell slightly. Don't worry about it. Such negative feelings will disappear after some time.
The puncture site should be wiped twice a day with any antiseptic. Your hands must be absolutely clean. The earlobe will have to be disinfected for at least a couple of weeks. During this period, try not to lie on your side while sleeping, and also do not wear clothes that have to be put on “over your head.”
In every possible way, avoid such actions that could at least minimally injure your pierced ears. If you notice that the wound on the lobe has begun to fester, consult a doctor immediately.
In general, piercing your ears yourself is considered quite dangerous procedure. Its direct consequences can include symptoms such as severe headache, failure in work internal organs, the occurrence of infection. Such consequences appear if the ear piercing is done in a way that deviates from the described technology, or if all disinfection and safety measures were not followed. Knowing all the intricacies of self-piercing your ears, you will make the right decision about whether to carry out this procedure at home.
As you can see, there is no clear opinion, and moms and dads have multiple related questions. Answers to them and recommendations from specialists will help solve the problem in each individual case.
The question of at what age is it preferable to pierce a child’s ears causes controversy among experts in various fields and parents.
It is necessary to consider the arguments of followers of early accustoming girls to earrings and supporters of late ear piercing.
The opinion that piercing is necessary for children under one year of age is held primarily by psychologists. They are convinced that if this procedure is carried out at the age of 6-10 months, the child will experience fewer negative emotions.
With early piercing, negative memories disappear almost instantly, but three-year-old children can return to a stressful situation for a long time and, as a result, may refuse to wear earrings altogether.
Mothers also agree with this opinion, but to a greater extent pursue aesthetic goals. Their main desire is for those around them to perceive the little princess as a girl, and not confuse her with a boy.
In addition, some parents are convinced that piercing the ears of girls under one year old will help avoid infection of the holes in the ears.
And yet, many experts oppose ear piercing before the age of three, citing quite reasonable and well-founded arguments. Let's look at them in more detail:
The popular doctor E. O. Komarovsky, when asked at what age it is better to pierce ears, answers that medicine does not impose strict age restrictions. However, carrying out the procedure at the age of less than 1 year is practically an extremist action.
A well-known pediatrician also points out the fact that ear piercing at 11 years of age and older increases the risk of skin scarring. But there is no need to worry about infection, since the procedure is carried out under sterile conditions.
Some parents do not pay attention to the time of year, believing that earrings will look attractive on both summer and winter days.
However, if we are talking about a child and his well-being, then everything should be taken into account possible factors and conditions. In this case, parents will be able to prevent possible negative consequences.

![]()
So, what time of year is best to carry out this procedure? Let's consider the arguments of experts:
Thus, in addition to age parameters, it is necessary to take into account the seasonal factor when piercing children's ears. This will avoid negative effects.
Despite the desire of parents to pierce the ears of their beloved children, there are a number of conditions and diseases in which it is necessary to either forget about the event for a while or abandon it altogether.
Experts highlight the following contraindications (temporary or permanent) to ear piercing:
It is better not to pierce the ears at all if the child, who is already at a relatively conscious age, is categorically against this procedure.
Probably the refusal is due to fear of the process itself or simply a dislike of earrings. Parents should not insist and use peers as examples. The girl has the right to decide for herself whether she needs such jewelry.
The procedure itself is quite simple, but you need to prepare for it. This is necessary in order to avoid all kinds of undesirable consequences.
First stage– medical consultations. A must visit with a child several specialists:
Second phase- choice medical institution or salon. If there are no contraindications to the procedure, then you need to move on to choosing a salon or clinic.

Is it possible to pierce a child’s ears at a regular hairdresser located nearby? It’s better not to take risks, but to turn to professionals who have documents confirming their qualifications.
An experienced specialist will determine safe places for piercing, will carry out the procedure itself as painlessly as possible and guarantee the absence of complications. Parents need to make sure that the instruments and earrings that end up in their children’s ears are sterile.
Third stage– purchasing earrings. Initially, girls are inserted into ears made of a special alloy, which, in fact, pierce the lobes. Then, when the wounds heal, mom will be able to insert other earrings.
We will tell you in more detail further about which jewelry to prefer. It is only important to understand that the hearts should be light, without sharp corners and with a strong clasp that will not open during child manipulation.
Another common question that concerns many parents concerns how to properly pierce a child’s ears. There are several options for the procedure: piercing with a special reusable or disposable gun and a special needle.
A specialist decides how to pierce your ears correctly. Parents need to choose the hygiene procedure that is most appropriate for their age and personal characteristics.
You can pierce a child's ears manually using a special disposable catheter needle. A big plus of such a procedure is the selection of a needle taking into account the size of the earlobe. Also, after piercing, you can put in any earrings, and not just standard “studs” or “rings”.

The procedure itself is quite simple and consists of from several steps:
Often, the mere sight of a needle causes horror in children; moreover, the procedure itself lasts quite a long time and is somewhat painful. So this method can be recommended to adult girls who are not afraid of medical manipulations.
Before piercing the ears with a gun, the auricle is again disinfected and the piercing site is marked. Then the device is charged with the stud earrings that the parents chose.
The specialist places the earlobe into a special section at the end of the device and shoots. As a result of these actions, piercing is carried out not with a needle, but directly with the earring itself, which is simultaneously threaded into the auricle. Then the earlobe is treated with a special healing preparation.
Piercing with a gun is different from piercing with a needle. In the first case, the wound turns out to be torn (which is fraught with keloid scars), and in the case of a needle, it becomes punctured. But piercing with a gun does not require time, and therefore is less painful.
Main advantages:
Main disadvantages:
How does this method of carrying out the procedure differ from the previous version? The standard ear gun is a reusable instrument with sterile piercing earrings. In this case, the tissues are torn and a loud sound is heard. In addition, infection cannot be ruled out.
System 75 is a special disposable device that is completely sterile. Outwardly, it looks like a classic stapler, into which a disposable cartridge is inserted. During the procedure, the specialist does not touch the jewelry at all.
And thanks to the special sharpening of the earrings, the fabrics do not tear. It is the puncture that occurs, so wounds heal much faster and the risk of all kinds of complications and undesirable consequences is reduced. In addition, the puncture is painless and silent.
How much will it cost similar procedure? Using a disposable gun is quite expensive - at least twice as expensive as a standard reusable gun.
The final price will depend on the quality of the selected earrings. Thus, not every parent can afford a puncture with a disposable instrument.
It should be remembered that children are prohibited from wearing cheap jewelry, large and heavy earrings, as well as jewelry with poorly set stones.
A detailed description of the characteristics of earrings that should be taken into account when choosing jewelry during a piercing and after the hole has healed is presented in the table.
| Decoration Options | When piercing | After the wound has healed |
|---|---|---|
| Material | Initially, it is better to put earrings made of special medical steel, titanium compounds or bioflex into children’s ears. All these materials are hypoallergenic. | Once the wounds have healed, you can purchase silver or gold earrings. |
| You should not wear them at the time of piercing, since gold contains allergic impurities, and silver oxidizes. | ||
| Form | There are many varieties of earrings for babies. But for the first time it is better to stick to standard small carnations. But the shape of their “head” can be varied: hearts, triangles, balls, etc. | |
| Surface Features | Earrings must be absolutely smooth, the surface without various protrusions, burrs and sharp parts that could scratch the child's skin. | |
| Presence of stones | Small, neat stones (not diamonds, of course, for the safety of the baby) are quite acceptable, especially when it comes to older children. Earrings without stones are also suitable for infants. | |
| Lock type | The ideal option is the same nails with a convenient clasp that a child cannot open on his own or damage. | After healing, you can put on earrings with an English lock that does not squeeze the earlobe. It is also difficult to open with children's hands. |
| Weight | The earrings should be light, otherwise the baby will feel heavy and uncomfortable. own ears. Naturally, we are not talking about comfortable wearing. |
To pierce ears to a small child- this is just the beginning hygiene procedure, since parents will have to regularly treat the ears and monitor possible negative consequences.
The rules of care are quite simple:
The wound usually heals within 30 days. After this period, the earrings are removed and treated with an antiseptic. If desired, the jewelry can be changed (they are also treated with peroxide). The earlobe is also lubricated with the drug, and at the end of the procedure the earrings are put back in.
When can a child's ears be pierced? This issue is decided by parents after weighing everything in advance. Some mothers bring their daughter to the salon in the first year of life, while others decide to leave the last word to the girl.
Another question is the choice of the type of procedure. Some specialists pierce the ears with special needles, others with a reusable or disposable “shooting” earring instrument. It's up to you to decide!
Ear piercing can be done in a beauty salon, or at home. In the second case, you do not overpay for the services of a master and do not call him to your home. At home, you can make not one, but several holes in one session. But at the same time, independent piercing is associated with a number of difficulties:
So how to pierce your ear at home quickly and painlessly? It is necessary to have special tools for piercing and materials to sterilize the skin, needle and earrings before the procedure.
Before you pierce your ears at home yourself, think about what tool you will use. You can pierce your lobes using a special piercing gun, a sterile catheter sold in any pharmacy, or you can use a regular needle. In the first case, you can pierce your ears in a few seconds almost completely painlessly, but in the second and third cases you will have to be patient a little.
Technically there is nothing complicated about this. The main thing is to take care of the sterility of the instrument and hygiene immediately after the manipulation. To disinfect the skin you can use:
Iodine or brilliant green can be used, but only to mark the puncture point. Before the procedure, it is recommended to additionally wash the ear with antiseptic soap (Safeguad is suitable), then moisten a cotton swab in alcohol or hydrogen peroxide and wipe the earlobe with it.
The ear piercing procedure using a special gun does not require the use of local anesthetic. The manipulation itself lasts a fraction of a second; there is no need to additionally insert an earring into the hole, as is the case with a manual ear piercing.

It is important to choose the puncture point correctly. This rule should not be neglected, because... contained in the ear acupuncture points related to the functioning of internal organs and systems of the body. Getting to such a point can be fraught with a decrease in immunity, an increase in the body's sensitivity to allergens, and a decrease in the pain threshold.
To correctly determine the point, the lobe must be mentally divided into nine squares and pricked into the central one. This way you can achieve a symmetrical arrangement of earring holes.
Attention! Many girls find it difficult to achieve perfect symmetry when piercing themselves, which is why the holes often end up 1-2 mm higher than each other. To avoid this, you can resort to a little trick. Take a regular thread, which needs to be tied exactly to the mirror so that the lobes in the reflection are at its level. Keeping your head level, adjust the thread according to the reflection, and make marks using iodine or a medical marker exactly along the line of the thread.
You will hear a click and a slight crunch of the cartilage as the needle passes through the lobe. After the procedure, carefully remove the gun downward. All that remains is to disinfect the ear with hydrogen peroxide or medical alcohol. The piercing procedure at home is completed.
Benefits of piercing with a gun:
The disadvantages of this method include the need to buy a pistol. For two holes this may be prohibitively expensive. But purchasing a special piercing tool will come in handy if you plan to do more piercings in the future.
The only advantage of this method is that there is no need to buy an expensive piercing tool. But that's where the benefits end. To pierce your ears with a needle, you need to choose the right needle thickness or use a regular medical catheter. It should not be too thin, otherwise the earring stud will not be able to fit into the hole. It is better to take a special medical needle or a regular darning needle.

The nuances of the piercing procedure using a regular needle:
The needle procedure may be more painful and require more courage. Before this, it is necessary to thoroughly disinfect the earlobe and mark the puncture point. Some recommend applying a piece of ice for 10-15 seconds to relieve pain. Instead, you can use ice-caine ointment.
The actual manual ear piercing is not difficult: you need to pull the earlobe down with the fingers of one hand and with a quick, confident movement, insert the needle into a predetermined point. It is advisable not to slow down the movement of the needle, because this may increase soreness.
Repeat the steps on both earlobes. Many people note that getting their second ear pierced is somewhat more painful than getting their first ear pierced. Common problem At the end of this procedure, put on earrings. It is recommended to use stud earrings with a straight tail for the first time - it is easier to insert it into the hole. Classic earrings with a safety pin type clasp are best worn after the holes have healed.
You must follow the instructions above for needle piercings. This method is much safer way with a needle thanks to the sterility of a disposable cutter purchased at a pharmacy.

The most important condition For fast healing- maintaining sterility and hygiene rules for two weeks after piercing the earlobes. Immediately after inserting the earrings, thoroughly treat the earlobes with medical alcohol or other antiseptic.
Do not remove the earrings until the holes are completely healed. During the healing process it is necessary to turn them and move them.
Other rules for caring for earlobes after piercing:
It is advisable to use earrings made of medical steel, silver and gold. It is better to wear ordinary iron or copper earrings after the holes in the earlobes have completely healed.
Attention! If after piercing the lobe becomes inflamed, the hole looks red and swollen, and pus mixed with blood is released from it, you should consult a doctor. An alarming symptom There will also be an increase in body temperature above 38°C.
It is possible to pierce your ears at home without pain. For this you do not need any complex devices or special skills. If you do everything according to the instructions and carefully care for the wounds, then there will be no problems.
On our auricle a huge amount has been collected reflex zones, so if you choose the wrong puncture site, you can disrupt the functioning of internal organs. The prick should be strictly in the middle of the lobe or 0.5 mm higher from its middle. There are no reflex zones or cartilage, so the puncture will be painless.
How to pierce your ear at home so as not to cause suppuration
To carry out the procedure at home, you will need a medium-thick sharp needle, iodine, a toothpick, cotton wool, hydrogen peroxide and alcohol. Next step-by-step instruction will help you do everything right.
The first earrings should be made of gold or a medical alloy. Choose jewelry with smooth arms without unnecessary decoration. You shouldn’t put on nails right away; they will make your ears difficult to handle.
Clean your ears with alcohol several times a day. Do not remove the earrings. To prevent them from growing into the skin, turn them regularly.
Alcohol tincture of calendula will speed up healing!
Sleep on a sterile pillowcase. Until the wounds heal, try to sleep on your back and wear your hair up all the time. Do not use hairspray or carefully cover your ears until the wounds have completely healed.

In 2018, the Nativity Fast will begin on November 28. During this period, Orthodox believers prepare to celebrate Christmas...

Starting a family is the dream of most women. They want to have a loving husband and a bunch of kids. But it's not always a relationship...

This article contains: the most powerful prayer for divorce - information taken from all corners of the world, the electronic network and...

Information site about icons, prayers, Orthodox traditions. Prayer for scandals and quarrels in the family, with husband, with children...

What would New Year be without champagne, tangerines, Olivier, aspic and everyone’s favorite “Herring under a fur coat”. With the last one...
Let's prepare the necessary ingredients for the cookies. The first thing to do is put the water to boil. We need...

Is it possible to register an employee for the position of financial director - chief accountant? The chief accountant claims...

The head of a small business can easily manage the budget independently. CHECKED! If you manage...

The creation of new projects involves a preliminary economic justification for their feasibility, subsequent...
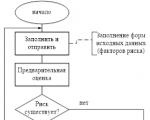
Reporting is generated by the RM, is agreed upon (approved) by the Risk Committee under the Management Board and transmitted to...

At the edge of a large, very large meadow, on a long emerald blade of grass lived a tiny Ladybug. God's little...

Nowadays, it is quite common for people to turn to the stars. With the help of a horoscope a person can find out...

Business or friendly. If you were pursuing a stranger, it means your level of trust in the female sex...

according to Freud's dream book If you dreamed about how you were fishing, it means that in real life you can hardly switch off...

Starting a family is the dream of most women. They want to have a loving husband and a bunch of kids. But it's not always...

This article contains: the most powerful prayer for divorce - information taken from all over the world, electronic...