The most complete interpretation of sleep orange
Orange juice. The symbolic meaning of orange juice in dream books is pleasure and temptation. Quite often we...
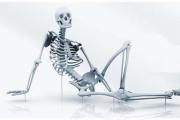
In the time of Queen Elizabeth, puffy ruffled collars made of stiffly starched lace or fabric were in fashion. The head lay on such a collar, as if on a platter. It was difficult to turn my head. However, the aristocrats had no need to turn their heads.
One day, some savvy dog or cat owner came up with the idea great idea build a protective collar for your pet that limits the animal’s ability to itch and lick itself. The invention quickly became known as the Elizabethan collar - an animal wearing such a collar looked very much like a nobleman of Elizabethan times. Over time, the invention began to be called shorter - simply E-collar.
A veterinary clinic or pet store (not just any store, it should be noted!) will offer you an assortment of E-collars. Modern industry produces E-collars different sizes, from different materials. Most often - made of thick plastic. The only problem is that industrial collars are not cheap, and you can’t buy them everywhere. And the need for such a product can arise suddenly, at any time of the day. What should I do?
What are golden hands for?
 An E-collar can be made at home from scrap materials without much difficulty. Moreover, there are several options for material for the collar, patterns, and methods of attaching the structure to the animal’s neck. All you have to do is choose the most suitable option, tinker a little, and - voila!- the pet is deprived of the opportunity to comb or lick the wound and begins to recover quickly.
Materials and tools:
sheet of plastic or cardboard;
scotch tape (adhesive tape);
scissors;
stapler

Manufacturing procedure:
1. Draw a circle on cardboard or plastic. The radius of the circle should be a few centimeters larger than the length of your animal's head.
2. Inside the large circle, draw two more circles with the same center. The diameter of the smallest circle should be slightly smaller than the circumference of the animal's neck. The diameter of the average circle is 3-5 cm larger.
3. Cut a large circle from the sheet. Then you need to cut the circle from the edge to the center in a straight line, and cut out the inner hole.
4. Make several radial cuts from the edge of the inner circle to the line of the middle circle. You will get several strips. By bending these strips, we get loops for attaching the collar to the collar.
5. Fix the bent strips with tape or a stapler (this is more reliable).
6. Along the radial cut line, bring the edges of the plastic one after another, forming a cone. Secure the form with a stapler or tape.
7. Place the cone on the collar, the collar on the dog. There should be no more than two fingers between the collar and the dog's body, otherwise it will not be difficult for the dog to get rid of the collar.
Ready.
Plus: availability of materials, ease of manufacture.
Minus: fragility. Additionally, the edges of the cardboard or plastic may be too sharp and hard and cause discomfort to your dog. The cardboard may tear or become wet from saliva.
These problems can be partially solved by using 0.5-1 cm thick polyethylene foam from a hardware store as a material. The material retains its shape quite well, is moisture resistant, and can be easily washed and disinfected if necessary. At the same time, its edges are soft and do not injure the dog’s skin. It can also tear, but still not as quickly as cardboard. It costs mere pennies.
Materials and tools:
sheet of plastic or cardboard;
scotch tape (adhesive tape);
scissors;
stapler
This option has a more thoughtful pattern. You can enlarge the image and print it on a printer.

Click to open full image

You can try replacing the plastic with dense polyethylene, stitched in several layers on a machine.
The strips with limiters are threaded into the corresponding slots in the cone, turning into loops for the collar. A long strip on the edge of the semicircle serves to fix the shape. Very comfortably. For greater reliability, the edges of the strips should be secured with tape or a stapler.
The pros and cons are the same as in the previous version.
It is often recommended to use plastic containers, large-diameter bottles, flower pots or plastic buckets (for big dogs). In practice, all these options are not very acceptable. The plastic used to make bottles and containers produces a very sharp edge when cut, which can literally cut you. So when using such material, sharp edges should be carefully isolated from contact with the animal’s skin.
Flower pots and plastic buckets are usually made of plastic that is too hard. It is very difficult to cut the necessary holes and securely and comfortably fix the structure on the pet’s neck. In addition, such products are too heavy and cause great discomfort to the animal. But if there is nothing else, these options are also suitable, although they have a lot of disadvantages...
And finally, I would like to wish that your pets never need any protective collars.
Collar - protection for dogs: do it yourself
The life of pets is filled with a variety of events. Sad moments often happen to them. Sometimes it happens that the dog requires surgery or, as a result of a fight in which your pet took part, he received a wound and now he should not be given the opportunity to lick the wound. In addition to this, there are many other situations that occur in a dog’s life. If your pet's health is damaged and it requires treatment, then in order for it to be carried out correctly, it is necessary to use a protective collar. You can find this accessory for dogs in any pet supply store. If you don’t want to spend money on purchasing this item, then you can easily make it yourself. How to make such an accessory at home is what will be discussed in this article.
A protective collar designed for dogs should be considered as part of restrictive therapy. The use of such an accessory allows you to prevent your pet from getting damaged in the form of scratching and biting. Thanks to the use of this item, you can significantly increase the efficiency of wound healing in your dog. Veterinarians quite often prescribe just such restrictive devices. Their wearing is prescribed in cases where, upon examination of the animal, diseases of a dermatological nature were discovered. In addition, veterinarians prescribe such devices after surgery on a pet. In addition, there are many other cases in which such an accessory is prescribed for a pet.
It is often not a joy for a pet to be in the clinic. For this reason, in order to ensure that the dog spends as little time in the hospital as possible, the owners decide to purchase an accessory such as a protective collar. This prevents the pet from touching its wound. He won't be able to bite or comb it. As a result, this has a positive effect on the wound healing process. Damage heals faster, which helps quick recovery pet. In addition, thanks to the protective collar, the risk of poisoning from drugs that veterinarians often use to treat skin on damaged areas is reduced.
If we talk in detail about such an accessory as a protective collar for dogs, it should be noted that its appearance is a cone, main feature which is the presence of a trimmed top. The materials used to make this accessory are plastic and nylon. In addition to them, cardboard can also be used. One of the main advantages of such an item is that when such an accessory is put on a pet, it does not create any obstacles for it to eat. If you make some efforts and are able to accustom your dog to a protective collar, then you will not have any problems with your pet. He will feel comfortable wearing such an accessory. Over time, the pet will begin to perceive this object as a familiar thing, and will not be nervous when such a protective collar is present on its head.

If you need an accessory such as a protective collar, then you don’t have to run to the pet supply store and buy it. After spending some time and putting in some effort, you can make it yourself. At the same time, by doing this, you can make an accessory that will be optimal for your dog. Note that when it is made, it is worth focusing on the breed pet. In principle, every owner can make a protective collar of absolutely any size, starting with a small one designed for dogs chihuahua breed and finishing with bulky accessories that can be used on shepherds or bulldogs.
If we talk about the choice of materials for the manufacture of a protective collar, it should be noted that it is not limited in any way. Therefore, if you look closely, you can easily find items in your home that may be suitable for you to create this accessory. Some people use buckets made of plastic to create this item. Some people create a collar using x-rays. There are dog breeders who take old canisters and adapt them to this dog accessory. Some people use a material such as cardboard. A fabric tablecloth may also be suitable for creating such an item. high density. In general, there may be a lot of things in the house, subjecting them to certain manipulations, you will ultimately be able to get the accessory you need. If you are the owner of a small pet, then when creating a protective collar it is best to choose a softer material. If a large animal lives in your house, then the material should be quite dense so that the pet cannot get to the wound and does not begin to scratch it, aggravating its situation. By choosing the right material to create a protective collar, you can create a comfortable and reliable accessory that will ensure a faster recovery for your pet.

If you have set yourself the goal of making a protective collar for your pet at home, then, of course, during this work you will need certain tools and material from which the accessory itself will be created.
It is best to use cardboard as the main material, or you can opt for plastic. You need to find it in your home in advance before starting work. If you don’t find it, then you should buy plastic products or cardboard in the store. If you have some other suitable material at home, then you should prepare it before starting work.
Regarding the tools for creating a protective collar for a dog, you will need scissors, and in addition to them, tape. As an alternative, you can use a stapler. It is also necessary to prepare soft materials in advance or find an old collar.
If you decide to make a protective collar for your dog on your own, you don’t have to worry; it will take you very little time to complete the work to create this accessory.
The first step in making an accessory is taking measurements. You need to measure the diameter of your dog's neck. This will be the starting point for creating the drawing.
After the measurements have been taken, you need to draw a circle on the material that you have chosen to create the protective collar. Note that when drawing a radius, the circle you create should be significantly larger than the actual diameter of your pet's neck. In order for the created drawing to be as correct as possible, you should use a compass when creating a circle. If you don’t have such a tool at home, then in order to draw the most accurate circle, you should use a plate that will be slightly larger in diameter than your dog’s neck.
Next you need to draw the outer circle. Note that the distance between the outer and inner circles should be 5 centimeters less than the length of your pet’s muzzle. By complying with this requirement, you will ultimately be able to create an accessory that your dog will not experience any discomfort when wearing.
The next step is cutting outer circle. Next you need to cut out the inner one. In order to do this, you need to make an incision in the center.
Then you need to pick up tape or a prepared stapler and attach the sides of the collar. To do this, they need to be superimposed on each other. As a result, you will end up with something similar to a cone with the top cut off.
After this, you need to try the collar on your dog to see if it is comfortable for your pet to wear.
Then you need to make short vertical cuts along the rim of the middle hole.
Particular attention must be paid to ensuring that you do not have any sharp corners or surfaces on the created collar collar. Otherwise, in the process of using the finished accessory, they can lead to injuries to your pet.
Another important point: Two fingers should fit comfortably between the neck and the collar. If this condition is met, then you don’t have to worry; wearing such a protective collar will be quite comfortable for your pet.
If you cannot find a collar at home that is suitable for use as part of a protective collar, then you can easily apply various tourniquets or use a suitable fabric.
If, when creating a protective collar, you decide to use a protective collar that is made of cardboard, then its service life will not be long. However, you have the power to extend its operation. To do this, you need to take the tape you have and wrap it around the surface of the future collar. In this case, saliva and water that gets on it will not soak the cardboard. This means it will serve for a longer time.
In contact with
It’s rare that an animal pleases its owners with absolute health and never gets sick. And no matter how much I would like to visit veterinary clinic exclusively for vaccinating the pet, sometimes they require surgical intervention.
The most common operation now is sterilization and castration of cats. Unneutered cats, especially those who have been given hormonal drugs, suffer from mastitis, cystosis, purulent pyometra ( purulent inflammation uterus), hydrometer (fluid formation in the body of the uterus), breast cancer, tumor diseases uterus and ovaries. All of these conditions threaten the cat's life and require immediate attention. surgical intervention. Operations are also performed for fractures, ruptures internal organs and for other reasons.
The main question after the owners have taken the animal from the veterinary clinic is how to care for it now? In addition to injections, tablets and ointments for treating stitches, the cat needs a protective collar.
A protective or Elizabethan collar for cats is a means of barrier therapy, a veterinary device that limits the animal’s mobility and does not allow it to break the integrity postoperative sutures by chewing, licking or scratching. It also prevents you from licking external preparations from the body or scratching damaged areas (bite marks, burns).
A properly selected protective collar for cats fits comfortably on the animal, does not interfere with its movement, eating and drinking, while limiting access to wounds, stitches on the body and limbs.
The only discomfort with a well-chosen and put on collar is the inability to lick yourself. Cats are clean animals and may be concerned about leaving scent marks. But this inconvenience is nothing compared to broken stitches, drug poisoning and damage to healing wounds. So the animal will have to be patient.
A cat collar is needed in the following cases:
On cats after abdominal operations sometimes cloth blankets are worn.
The big advantage of the blanket is that it protects the seam not only from the impact of the cat itself, but also from contact with objects. At the same time, the cat’s movements are not limited, she almost does not feel the blanket and quickly gets used to it. The pet can lick itself and not worry about the smell.
The disadvantages of a blanket are that it gets dirty quickly, and your pet can tear it off with its claws. The movement of the tongue along the blanket at the seam site sometimes leads to damage to the seam, even through the fabric. The blanket cannot be used when treating the animal's body, because it will absorb ointments, sprays and gels.
The advantages of the collar are that access to the place surgical intervention or processing is completely limited. The collar will prevent the cat from hiding in hard to reach place, where they often hide when they feel unwell.
The disadvantages of the collar are as follows:
Protective collar for cats it is necessary for various kinds medical interventions. It preserves the health of the animal, being necessary measure in the postoperative period. Source: Flickr (thebiblioholic)
There are two types of collars:
Important! After the operation, the cat must be handled with extreme care: do not squeeze it, do not grab it sharply and do not forcibly pull it out, holding it by the paws, from somewhere to avoid damage to the sutures, internal bleeding or an epileptic seizure.
A collar that is too large or heavy for a cat will greatly impair coordination: it will be difficult and even impossible for him to jump anywhere, pass between objects, eat and drink.
A collar that is too tight will lead to hypoxia – oxygen starvation brain, poor circulation, chafing of the skin at the point of contact, and hair loss.
An animal can remove an excessively loose collar, or it will slip lower and complicate movement.
It is unacceptable to buy collars with a strong “chemical” smell. These products are of low quality and your cat may be poisoned by wearing them.
Buying a collar for a kitten “for growth” is not The best decision. A young animal will feel uncomfortable in a bulky structure designed for an adult. A collar is not such an expensive thing to buy for future use. It is better to select it individually each time than to squeeze a large cat into a small collar or try to attach a device purchased for an older cat to a “teenager”.
The sharp edge of the collar at the point of contact with the cat’s body should be covered with an adhesive plaster on a fabric basis.
The collar must be removed periodically to allow the animal to run freely and restore muscle tone. It would be good to put a blanket on a cat after abdominal surgery. The animal must not be left unattended while the collar is removed.
A protective collar for cats is necessary for various types of medical interventions. It preserves the health of the animal, being a necessary measure in the postoperative period and during conservative treatment preparations for external use. The cat quickly gets used to the inconvenience of wearing it. In addition, a properly selected protective collar almost does not cause them.
After our cat Murka had her eye operated on, we had to put a protective collar on her so that she wouldn’t tear the stitches and cause an infection. We used to put this collar on our cats, and no special problems did not have. But this time everything turned out to be a complete nightmare. For five hours we could not attach the protective collar to the cat.
The collar we bought from the vets turned out to be too big, but since there were no others in stock, we had to make do with this one. I sewed on additional Velcro and tried to put it on while Murka was still recovering from the anesthesia.
But as soon as she got up and started moving, we realized that with such a device she would not only be able to walk, but also sleep. Her head looked like it was in a megaphone. She shied from side to side, resting it against the wall so tightly that after a few seconds she could no longer breathe.
I have never seen such a stupid design before. And an hour later she simply walked up to the door frame, rested this collar on the frame, dashingly took it off and began licking her eye.
It was necessary to come up with something urgently. We cut out a new collar from cardboard, attached strings to it and put it on the cat. Now the collar looked like a plate. But Murka could drink in it and move freely around the room without running into obstacles.
Everything would be fine, but other cats surrounded her and began to stretch out their paws to touch this “miracle”. We were afraid that one of them might hurt her. I had to put Murka in the closet and close the sliding door so that none of the cats could get in there.
Without a collar, the cats were quite comfortable in this closet, but with it this comfort turned into a problem, because... With such a “plate” you won’t be able to move much. But we couldn’t come up with anything else yet.
Less than ten minutes had passed before Murka tore the cardboard collar to shreds and began licking her eye again. We wrapped it in a towel and began urgently finishing the first version of the collar. It was clear that it needed to be somehow secured to the cat so that she could not remove it.
We sewed it to plastic collar four loops on the bottom side, which will be attached to the neck. My daughter quickly knitted a harness, which we put on Murka’s torso and threaded the straps into the loops of the collar. It turned out something like this

It turned out approximately like in this photo
All this was secured and we breathed a sigh of relief. But it turned out it was too early.
After a few minutes, we had to cut notches at the top and bottom of the collar so that the cat could drink on its own and raise and tilt its head at least a little. We decided to lock her in the kitchen at night so that other cats wouldn’t touch her, and she could drink and go to the litter box herself.
Everyone went to bed. You could hear poor Murka walking and poking at all the walls. After 15 minutes there was suddenly silence. I decided to check what was happening there. I went into the kitchen and was stunned. Murka sits, washes herself, and her collar hangs at her side.
Somehow I untied the ribbons, unfastened the collar and put everything on again. The ribbons had to be secured under her armpits and pulled tighter. I checked that it wasn’t too tight anywhere.
All night I worried and listened to sounds from the kitchen. Only after three o'clock in the morning the cat calmed down and fell asleep under the radiator on a soft rug.
Those ten days that Murka was in the collar until the stitches were removed from her eye seemed like hell to us. I never expected such agility from her. And the cat was even more fed up with everything during this time. Not only could she not wash herself, but her eye was probably itching.
Some write that they removed this collar during feeding, but this would not have worked for us, and we did not want to further injure the cat. That's why we hand-fed Murka. It's good that she has a good appetite.
But how happy she was when, 10 days later, we removed the stitches from her eye and removed the collar! And although the doctor did not advise removing it just yet, we still took the risk. They just made sure that Murka didn’t bother washing that particular eye.
For three days she washed herself all the time and purred with happiness. God grant that she never has to wear that collar again.
Unfortunately, our pets also get sick and their illness is not always predictable. If a cat is on the operating table, it will require special care. The speed of a pet’s recovery depends not only on the owner, but also on the integrity of the stitches. The problem is that the healing sutures are very itchy and the cat languishes with the desire to lick or even chew them. To keep the seams intact, you need to buy or make a cat collar.
Elizabethan collar is post-operative accessory, but it is also used for other purposes. For example, with many skin diseases It is contraindicated to wet the skin, and the cat can lick it. At ear mites pets scratch their heads a lot, and the collar will prevent this from happening. Cats really don’t like bandages and do their best to remove them. To untie the knots, the pet usually uses its teeth, but if there is a collar, it will not work.
Important! If the veterinarian has prescribed the wearing of an Elizabethan collar, this recommendation should be heeded.
You won't be able to watch your cat every second. Even if you take a vacation from work, you will have to sleep... and what will your ward do during this time? That's right, scratch, lick, remove bandages or blankets, etc.
The Elizabethan collar has grooves into which the collar is threaded. Some models are secured with ties or drawstrings, which is not entirely suitable for temperamental animals. It must be taken into account that when wearing a collar, the cat should be able to take food and water, that is, its brim should not be too long. If your pet declares a boycott, then the collar will have to be removed while taking food and water, naturally, under your strict supervision.
Be sure that your pet will be unhappy with the collar. For a while he will move strangely and look at you pleadingly. Don’t give in, most cats quickly get used to the accessory, and if the pet is too persistent, check if the collar is rubbing.
Where can I get an Elizabethan collar? Buy or make. Most factory models are made in a wide size range. More expensive accessories have Velcro, fabric edging or are made of soft material so that the cat can sleep comfortably.
This is interesting! The Elizabethan collar was invented in the 60s of the 20th century. The name of the accessory is directly related to the reign of Elizabeth I (Queen of England), when it was fashionable to wear puffy, cone-shaped collars.
The Elizabethan collar is widely used in veterinary medicine not only for cats, but also for dogs. Wearing such an accessory is important if your pet:
The Elizabethan collar is primarily about the safety of your pet.. Yes, perhaps it is not comfortable and looks strange, but it is only needed for a short period. Without a collar, a cat can significantly complicate its condition. There are known cases when quadrupeds removed sutures after abdominal operations on abdominal cavity(along the white line), followed by repeated anesthesia, suturing and the threat of peritonitis.
Very often, owners ignore the recommendation to wear an Elizabethan collar after castration. This should not be done, since a cat's tongue is rough and irritates damaged skin. The cat will lick the affected area after using the toilet and at any convenient time. Even if the pet does not chew the stitches, the skin becomes thinner from licking, and the threads tear the skin.
Accept that you may not have the opportunity or time to find and purchase the right accessory. However, there is no need to worry about this; making a protective collar with your own hands is not difficult, even if you don’t have the right materials at hand. To make an accessory a quick fix You can use cardboard, a plastic bottle, a seedling pot and other materials. The only thing you definitely need when making an Elizabethan collar is a wide and comfortable collar to wear.

More the best option The accessory will be attached to the harness. When using a harness, the weight of the collar, and therefore the load, is distributed along the spine, and does not fall only on the neck.
The simplest option is to make a collar from a stationery folder. If you cut it along short seams, you will get a fairly large, flexible, oilcloth fabric. In addition to the folder, you will need:
To make a collar, you need to take two measurements: the circumference of the neck and the length of the head in a straight line from the neck to the nose. On a sheet of paper we draw a pattern of two circles:
The pattern is ready - try it on the cat. We make the necessary adjustments, take a marker or pen and transfer the pattern to the cut folder. We fold the strips cut for the loops in half, fasten them with a stapler and wrap them with flight tape. so that the staples do not prick. We thread the collar through the loops - half the job is done. We measure the cone again. If everything is in order, we connect the cone along the cut line, sew it with a stapler, and seal it with adhesive tape. At this point, it is important to note that you still have to put the collar on the cat. If the animal's head is damaged, most of the incision (from bottom to top) is better not to fix it with staples.
Important! One finger should fit freely between the collar and the cat's neck. A smaller gap will result in chafing, a larger gap will allow cats to remove the collar with their hind paws.
This option is the easiest to make at home. It does not require special skills or the purchase of special materials. The downside is questionable reliability. While the cat is recovering from anesthesia, this option is more than suitable, but when it starts to actively itch, the structure may not hold up. If you have thin plastic on hand (for example, a flexible cutting board), it is better to use it as a base. The advantage is its durability and the fact that its edges can be melted (sharp edges can rub the skin).
A very simple version of making a cardboard collar is shown in the video below. The main character of the video is a bracket, but that’s not the point. As you can see, the owner got out of the situation very simply. I cut out a semicircle from cardboard along the length of the collar and attached it with adhesive tape. Due to the increased length, the edges of the collar overlap each other.
To make a more reliable Elizabethan collar from cardboard, you will need a set of tools, which were given in the instructions above: scissors, tape and a stapler. Note that this pattern can be used to make a collar not only from cardboard. You can see the pattern diagram in the figure. The measurements taken are the same as in the previous version: neck girth and head length.

We draw up a similar diagram based on the measurements taken on thin paper and cut it out. We try on the pattern and adjust if necessary. To make a collar, you need to use thin and flexible cardboard (plastic is possible). We transfer the pattern to the selected material, cut it out, and fix the loops.

Next, you need to put the collar into the loops and do another fitting. As you can see, this model has an additional tail, which allows you to wear the collar open and neatly fix it. This option is very convenient if the cat has damage to its head, eyes, nose, ears, etc.
The most important condition To make an Elizabethan collar from a plastic bottle, you need to choose a container of a suitable diameter. Typically, 2-liter bottles are used for medium-sized cats. On the side of the neck, a diameter is marked that is maximally equal to the girth of the cat’s neck. Cut off the neck and measure the length of the head. Using the marks obtained, we cut off the remaining part of the bottle. We get a solid truncated cone. In order to put a collar on a cat, the cone is cut lengthwise. Along the cut line on both sides we make several holes for lacing. It is convenient to make holes with a screwdriver or knife heated over a fire. The second option is to sew in X-shaped lacing with a gypsy needle.
Before threading the rope, all cuts must be melted or carefully covered with a wide adhesive plaster. Sharp cuts can chafe or even cut your cat's skin. If you know how to sew, you can make a soft fabric cover for such a rough design.
Next, you need to attach loops to the resulting collar into which the collar or harness will fit. Even if your pet is very calm, fixing the collar is mandatory. It is advisable to close all edges soft cloth. When using a bottle collar, you need to make sure that the cat can eat, drink and sleep. Remove the collar after 20-40 minutes of wear and check the condition of the skin under the collar. If redness is noticeable, you should use a harness.
Note! Using the same principle, a collar can be made from a small pot or bucket. However, the worse the collar fits to the collar, the more likely that the cat will take it off.
If your pet is going to wear an Elizabethan collar for a long time, you should think about comfort. Cats adapt to taking food and water in a collar quite quickly, but comfortable sleep, when wearing a plastic accessory, they can only dream. A fabric collar is more difficult to make, but it has three very serious advantages:

It is better to make such a collar from light fabric (cotton, linen). Since such material is easily deformed, you need to use rigid racks (plastic strips) or reinforcing materials (non-woven fabric, mesh). The fabric collar should be two or three layers. It is better to trim the edges with braid.
To make an Elizabethan collar from fabric, all the same measurements are taken, only the length of the product can be slightly reduced. The edges along the cut are fastened with Velcro (you need to take into account the margin when making the pattern) or lacing. If you have already taken up a needle and thread, choose a soft material to make loops for the collar. The singing parts themselves need to be made wider, this way you will reduce the load on your neck.
The only disadvantage of the Elizabethan fabric collar is its relatively low shape stability. If the cat protests very much, the shape of the collar will very quickly become deformed. On the other hand, the brim of the accessory can be made not wide, so that it covers only the cheeks, and to prevent the cat from turning the collar outward, you need to lace it tightly.

Orange juice. The symbolic meaning of orange juice in dream books is pleasure and temptation. Quite often we...

We most often overcome all kinds of difficulties encountered along the path of life. Of course, for this we make...

This year your patron Neptune will be in your constellation and this is a good sign, because you will feel...

1993 who? 1993 is the year of which animal? — According to the Chinese horoscope, 1873, 1933, 1993 belonged to the years of the Black Water...

Wave-particle duality of light means that light simultaneously has the properties of continuous electromagnetic...
The role of biology is enormous in our world. Although it is not a priority subject, most students and parents...
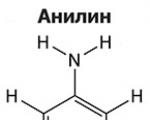
Amines are organic derivatives of ammonia containing an NH 2 amino group and an organic radical. In general...
How to answer questions in Part BThe second part of the social studies work consists of 7 tasks with a short answer....
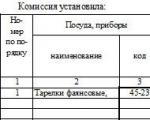
Form TORG-15 is drawn up in the case when during transportation, movement between and within the warehouse, when...

Nutritionists say that for good health and a slim figure, you must include snacks in your...

Delicious pickled carrots for the winter can be prepared in a variety of containers, it can be a wooden...

When I have a few minutes left to prepare breakfast, the simplest and fastest recipes are used....

An elegant table, a decorated Christmas tree, tangerine spirit spilled throughout all the rooms, soon the most magical holiday -...

Each of us has repeatedly faced financial difficulties and difficult periods in life when Fortune...

We most often overcome all kinds of difficulties encountered along the path of life. Of course, for this we...

This year your patron Neptune will be in your constellation and this is a good sign, because you will...